본문 바로가기
DBMS

SingleStore Distributed DBMS 소개 및 linux에 설치(install)하기

by developer's warehouse 2023. 12. 8.

이 글에서는 SingleStore에 대해서 알아보고 설치하는 방법에 대해서 설명합니다.
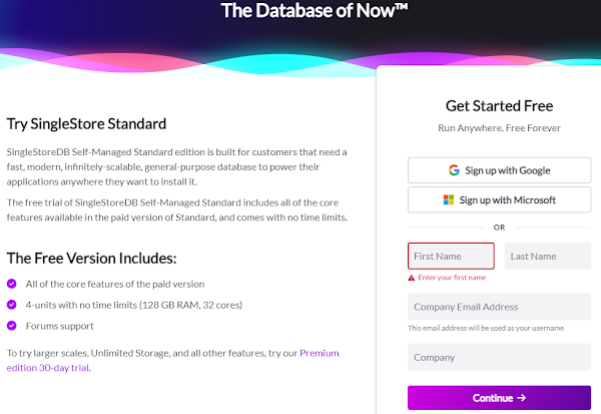
SingleStore Distributed DBMS 소개 및 linux에 설치(install)하기 썸네일

SingleStore DBMS란?

SingleStore는 분산형 관계형 데이터베이스로, 대규모의 트랜잭션(OLTP)과 실시간 분석(OLAP)을 동시에 처리할 수 있다고 합니다. 이 데이터베이스는 표준 SQL 드라이버를 통해 접근할 수 있으며, 조인, 필터, 그리고 분석 기능을 포함한 ANSI SQL 문법을 지원합니다. 예를 들어, 집계, 그룹화, 그리고 윈도우 함수 등의 기능을 사용할 수 있습니다.


또한, SingleStore는 모든 데이터를 하나의 플랫폼에서 운영화 함으로써 비즈니스가 더 빠르게 적응하고 다양한 데이터를 수용하며 디지털 혁신을 가속화하는 데 도움을 줍니다. 이는 클라우드 네이티브 아키텍처를 통해 데이터를 적재하고 쿼리 성능을 제공함으로써 현대의 애플리케이션과 분석 시스템에 대한 즉각적인 통찰력을 제공합니다.

라고 합니다.

그래서, 테스트 해보려고 합니다.

SingleStore local 장비에 설치하기

리눅스 장비에 설치해 봅니다.

참고로 singlestore 설치는 GLIBC_2.16 이상에서 설치 가능합니다.

사전 준비 및 다운로드

1. user 먼저 생성합니다.

$ sudo useradd -d /home1/singlestore singlestore

2. singlestore standalone을 다운 받습니다.

위 링크에서 다운 받을 수 있습니다.
접속하면 아래와 같은 화면이 나타나는데, google로 시작할 수 있습니다.

singlestore standard download

singlestore 가입중 회사 email 입력 시 아래와 같이 일반 email(gmail,naver등 포함)을 입력하면 다음 단계로 진입하지 않습니다. 그러므로, 알려지지 않은 메일이나 없다면 그냥 정상적이지 않은 메일 주소를 넣으면 넘어갑니다.

singlestore 가입중 회사 email 입력 팁

설치 방법은 다음과 같이 docker를 이용한 Quick Start와 Full Installation이 있습니다. 저의 경우 직접 장비에서 테스트를 하려고 하기 때문에 Full Installation으로 선택하였습니다. 추가로 아래에는 OS 혹은 환경을 선택하는데, Linux를 선택하였습니다.

install 방법

install 라이선스
 
view installation guide를 누르면 singlestore 문서 페이지로 이동합니다.
아래 페이지에서 linux 설치 문서를 확인합니다. view guide를 눌러서 들어갑니다.
https://docs.singlestore.com/db/v8.1/deploy/linux/
 

singlestore 설치 옵션은 다음과 같습니다. 여기에서 저는 command line으로 설치를 진행합니다.

singlestore 설치 옵션

다음과 같이 single storedb를 다운로드 받습니다.


download singlestore


다음 명령 세 개를 순차적으로 실행하면 path가 나타납니다. 각각 나타난 path에 있는 최신 버전에 대해서 wget으로 다운로드를 받습니다.


% curl https://release.memsql.com/production/index/memsqltoolbox/latest.json
{
  "releaseID": "75d51f69-6316-45c1-8fa2-6cdc09de9845",
  "version": "1.17.3",
  "commit": "c98d2138662dab352f78d584e6f4aca02cdca247",
  "packages": {
    "memsql-toolbox-deb": {
      "Path": "production/debian/pool/singlestoredb-toolbox_1.17.3_c98d213866_amd64.deb",
      "Sha256Sum": "0dfa1fac03f17fdd1f9ae55176a48f171347975a87f9f4b3c8d1c7509c0891b4"
    },
    "memsql-toolbox-rpm": {
      "Path": "production/rpm/x86_64/singlestoredb-toolbox-1.17.3-c98d213866.x86_64.rpm",
      "Sha256Sum": "24c74e70b9004947ea5ea521f080b5e4b2cda7433961ea75875c7fbe3ea952d1"
    },
    "memsql-toolbox-tar": {
      "Path": "production/tar/x86_64/singlestoredb-toolbox-1.17.3-c98d213866.x86_64.tar.gz",
      "Sha256Sum": "727e371b8082ff948145c07d6f452ff331c5d38fe3cbb1a55a80647ee1e01fcf"
    }
  }
}

curl https://release.memsql.com/production/index/memsqlclient/latest.json
curl https://release.memsql.com/production/index/singlestoredbserver/latest.json
위의 내용으로 나타나면 최종적으로 다음의 명령을 수행하여 다운로드 받을 수 있습니다.
 
wget https://release.memsql.com/production/tar/x86_64/singlestoredb-toolbox-1.17.3-c98d213866.x86_64.tar.gz
wget https://release.memsql.com/production/tar/x86_64/singlestore-client-1.0.7-9e7c21fd02.x86_64.tar.gz
wget https://release.memsql.com/production/tar/x86_64/singlestoredb-server-8.1.24-0830a86124.x86_64.tar.gz
 
최종적으로 다운로드 되는 것은 아래의 세 개 파일 입니다.
singlestoredb-toolbox-1.17.3-c98d213866.x86_64.tar.gz 100%[===========================================================================================================================>] 81.35M 10.3MB/s / 8.3s
 
2023-10-06 19:07:12 (9.75 MB/s) - ‘singlestoredb-toolbox-1.17.3-c98d213866.x86_64.tar.gz’ 저장함 [85298742/85298742]
 
singlestore-client-1.0.7-9e7c21fd02.x86_64.tar.gz 100%[===========================================================================================================================>] 3.84M 8.07MB/s / 0.5s
 
2023-10-06 19:07:13 (8.07 MB/s) - ‘singlestore-client-1.0.7-9e7c21fd02.x86_64.tar.gz’ 저장함 [4025180/4025180]
 
저장 위치: ‘singlestoredb-server-8.1.24-0830a86124.x86_64.tar.gz’
 
singlestoredb-server-8.1.24-0830a86124.x86_64.tar.gz 100%[===========================================================================================================================>] 273.76M 9.53MB/s / 29s
 
2023-10-06 19:07:43 (9.46 MB/s) - ‘singlestoredb-server-8.1.24-0830a86124.x86_64.tar.gz’ 저장함 [287057446/287057446]
 
참고로 singlestore 설치는 GLIBC_2.16이상에서 동작합니다.

패키지 파일 압축 해제

sudo가 아닌 사용자가 기본 배포 호스트에서 액세스할 수 있도록 구성된 전용 싱글스토어 디렉터리(예: /home/<user>/singlestore 또는 /opt/singlestore)로 singlestoredb-toolbox, singlestore-client 및 singlestoredb-server tarball 파일을 전송합니다.

압축은 서버를 제외한 두 개의 파일에 대해서 해제합니다. 서버는 나중에 배포 과정에서 해제됩니다.

$ tar xvzf singlestoredb-toolbox-1.17.3-c98d213866.x86_64.tar.gz

$ tar xvzf singlestore-client-1.0.7-9e7c21fd02.x86_64.tar.gz

Deploy SingleStoreDB

Minimal Deployment

SingleStoreDB는 최소 두 개의 노드로 배포하도록 설계되었습니다:


  • SQL 쿼리를 실행하고 결과를 집계하는 마스터 애그리게이터 노드
  • 데이터 저장 및 처리를 담당하는 단일 리프 노드


이 두 노드는 단일 호스트(via the cluster-in-box option)에 배포하거나, 두 호스트에 배포할 수 있으며, 각 호스트에 하나의 SingleStoreDB 노드를 사용할 수 있습니다.

필요에 따라 추가 애그리게이터와 노드를 추가 및 제거할 수 있지만, 최소한의 SingleStoreDB 배포는 항상 이 두 노드로 구성됩니다.

아래 링크를 참고하여 CLI Deployment - Tarball 단계로 실행합니다.

CLI Deployment - Tarball

1. Change to the singlestoredb-toolbox-<version> directory.

$ cd singlestoredb-toolbox-1.17.3-c98d213866

$ pwd

/home1/singlestore/singlestore/singlestoredb-toolbox-1.17.3-c98d213866

2. Deploy SingleStoreDB. The following command deploys a 4-node SingleStoreDB cluster with a Master Aggregator node, a Child Aggregator node, and two leaf nodes.
./sdb-deploy setup-cluster -i <id_rsa-file-including-path> \
--license <license-from-portal.singlestore.com> \
--master-host <master-aggregator-ip-or-hostname> \
--aggregator-hosts <child-aggregator-ip-or-hostname> \
--leaf-hosts <leaf-1-ip-or-hostname>,<leaf-2-ip-or-hostname> \
--password <secure-password> \
--force-package-format tar
--file-path "/path/to/singlestoredb-server-<version>-<commit-hash>.x86_64.tar.gz"

Note the inclusion of the --force-package-format option.

Note: Creating a node with an empty root password may be convenient for testing purposes.

While this is not recommended, you can specify a blank password via: --password "".


singlestore 설치 시에 sudo 권한을 요구합니다. 그러므로, singlestore계정에 sudo 권한을 부여합니다. 다음의 명령을 수행하여 sudo 권한을 부여하는 라인을 편집합니다.

# visudo

아래와 같이 singlestore 계정에 모든 sudo 권한을 부여하는 라인을 root 아래에 추가합니다.

root ALL=(ALL) ALL
singlestore ALL=(ALL) ALL
 
메뉴얼에는 위와 같이 4 노드에 대한 예제만 나타나있습니다. cluster-in-a-box를 위의 명령에서 변경하여 다음과 같이 입력하였습니다.
$ ./sdb-deploy cluster-in-a-box --password "" --force-package-format tar --file-path "/home1/singlestore/singlestoredb-server-8.1.24-0830a86124.x86_64.tar.gz" --license BDkzMWM0NGFhZjE5YzRiMGVhODRlZDY0MjRlNmFmZWIxAAAAAAAAAAAEAAAAAAAAACgw....
WARNING: --force-package-format will be ignored, package format will be inferred from --file-path
sdb-deploy will perform the following actions:
· Register Hosts
- Host: 127.0.0.1
+ Localhost: true
+ Tar Install Dir: /home1/singlestore/memsql
+ Tar Install State: /home1/singlestore/memsql/packages.hcl
· Install singlestoredb-server
- Install singlestoredb-server 8.1.24-0830a86124 on 127.0.0.1
· Check Clean State
- Verify no nodes currently exist in the cluster because cluster-in-a-box can only be used with a clean cluster state
· Create Master Node
- On Port 3306
· Run 'memsqlctl create-node --port 3306 --bind-address 127.0.0.1 --no-start'
· Run 'memsqlctl update-config --key secure_file_priv --value <install-dir>/db_files'
· Run 'memsqlctl start-node'
· Run 'memsqlctl change-root-password --password ●●●●●●'
· Create Node
- On Host: 127.0.0.1
+ On Port 3307
- Run 'memsqlctl create-node --port 3307 --bind-address 127.0.0.1 --no-start'
- Run 'memsqlctl update-config --key secure_file_priv --value <install-dir>/db_files'
- Run 'memsqlctl start-node'
- Run 'memsqlctl change-root-password --password ●●●●●●'
· Add Leaves
- Run 'memsqlctl add-leaf --host 127.0.0.1 --port 3307'
· After executing the above actions the cluster is going to be in the following state:
- 1 Master Aggregator
- 1 Leaf
 
Would you like to continue? [y/N]:
· Update specific system files on host 127.0.0.1 for the initial cluster configuration.
 
Files to be added:
 
- /etc/sysctl.d/90-singlestore.conf
Files to be updated:
 
- /sys/kernel/mm/transparent_hugepage/defrag
- /sys/kernel/mm/transparent_hugepage/enabled
- /etc/security/limits.conf
 
Create a link to /etc/pki/tls/certs/ca-bundle.crt if the file exists in a standard location.
 
Add a new systemd service, if available:
 
- /etc/systemd/system/singlestoreConfigOS.service - .service file
- /etc/singlestoreConfigOS - service logic file
 
To skip this step, re-run this command with the --skip-auto-config flag.
 
The host may require a reboot for these changes to take effect. To restart your cluster after a reboot, run 'sdb-admin restart-node --all'.
 
 
Would you like to continue? [y/N]:
 
sudo password for singlestore@127.0.0.1:
✓ Registered hosts
✓ Installed singlestoredb-server-8.1.24-0830a86124 on host 127.0.0.1 (1/1)
✓ Successfully installed on 1 host
✓ No nodes to register
✓ Created master node
✓ Successfully set license
✓ Bootstrapped master aggregator
✓ Created all Nodes
✓ Added leaf nodes to the cluster
✓ No aggregators to add
✓ Ran 'memsqlctl optimize' on host 127.0.0.1
✓ Ran 'memsqlctl update-config --set-global --key default_partitions_per_leaf --value 8' on host 127.0.0.1
✓ Ran 'memsqlctl update-config --set-global --key expected_leaf_core_count --value 8' on host 127.0.0.1
The Final Cluster State
Hosts
+-----------+------------+-------------+---------------+
| Host | Local Host | SSH address | Identity File |
+-----------+------------+-------------+---------------+
| 127.0.0.1 | Yes | | |
+-----------+------------+-------------+---------------+
Nodes
+------------+--------+-----------+------+---------------+--------------+---------+----------------+--------------------+--------------+
| MemSQL ID | Role | Host | Port | Process State | Connectable? | Version | Recovery State | Availability Group | Bind Address |
+------------+--------+-----------+------+---------------+--------------+---------+----------------+--------------------+--------------+
| 774BAA15D0 | Master | 127.0.0.1 | 3306 | Running | True | 8.1.24 | Online | | 127.0.0.1 |
| 4B97F78073 | Leaf | 127.0.0.1 | 3307 | Running | True | 8.1.24 | Online | 1 | 127.0.0.1 |
| F04D91D303 | Leaf | 127.0.0.1 | 3308 | Running | True | 8.1.24 | Online | 1 | 127.0.0.1 |
+------------+--------+-----------+------+---------------+--------------+---------+----------------+--------------------+--------------+
 

위와 같이 설치가 되었습니다.

Analyze your current cluster configuration

sdb-admin 최적화 명령을 사용하여 현재 클러스터 구성을 분석합니다.

이 명령은 현재 클러스터 구성을 모범 사례 집합과 비교하여 확인하고 성능을 최대화하기 위해 변경하거나 권장 사항을 제공합니다.

NUMA를 지원하는 호스트의 경우, 이 명령은 리프 노드를 특정 NUMA 노드에 바인딩합니다.


$ ./sdb-admin optimize

toolbox will perform the following actions:

· On host 127.0.0.1:

- Run 'memsqlctl optimize'

- Run 'memsqlctl update-config --set-global --key default_partitions_per_leaf --value 8'

- Run 'memsqlctl update-config --set-global --key expected_leaf_core_count --value 8'


Would you like to continue? [y/N]: y

✓ Ran 'memsqlctl optimize' on host 127.0.0.1

✓ Ran 'memsqlctl update-config --set-global --key default_partitions_per_leaf --value 8' on host 127.0.0.1

✓ Ran 'memsqlctl update-config --set-global --key expected_leaf_core_count --value 8' on host 127.0.0.1

Operation completed successfully


SingleStore local 장비에서 테스트 하기

다음의 명령어로 접속하여 테스트 해 볼 수 있습니다.

singlestore -h <Master-or-Child-Aggregator-host-IP-address> -P <port> -u <user> -p<secure-password>
 
Nodes
+------------+--------+-----------+------+---------------+--------------+---------+----------------+--------------------+--------------+
| MemSQL ID | Role | Host | Port | Process State | Connectable? | Version | Recovery State | Availability Group | Bind Address |
+------------+--------+-----------+------+---------------+--------------+---------+----------------+--------------------+--------------+
| 774BAA15D0 | Master | 127.0.0.1 | 3306 | Running | True | 8.1.24 | Online | | 127.0.0.1 |
 

위에서 보는 것 처럼 master는 127.0.0.1의 3306으로 대기하고 있으므로

[singlestore@dbdm singlestore-client-1.0.7-9e7c21fd02]$ ./singlestore -P 3306

Welcome to the MySQL monitor. Commands end with ; or \g.

Your MySQL connection id is 60

Server version: 5.7.32 SingleStoreDB source distribution (compatible; MySQL Enterprise & MySQL Commercial)


Copyright (c) 2000, 2022, Oracle and/or its affiliates.


Oracle is a registered trademark of Oracle Corporation and/or its

affiliates. Other names may be trademarks of their respective

owners.


Type 'help;' or '\h' for help. Type '\c' to clear the current input statement.

singlestore> show databases;

+--------------------+

| Database |

+--------------------+

| cluster |

| information_schema |

| memsql |

+--------------------+

3 rows in set (0.00 sec)


singlestore>


facebook twitter kakaoTalk kakaostory naver band shareLink